ConnX Learning Center
New ConnXion Guide
A ConnXion is used to tell us where we should send your leads. You can receive your leads in real time or on a daily basis (batch). We have pre-built integrations with many of the most popular destinations, to help you along. We also offer an Advanced ConnXion tool where you can configure a custom destination.
Start
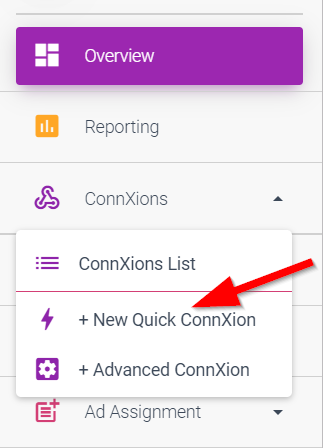
Most users will want to start by choosing a Quick ConnXion. Select this for a list of pre-configured destinations.
Source
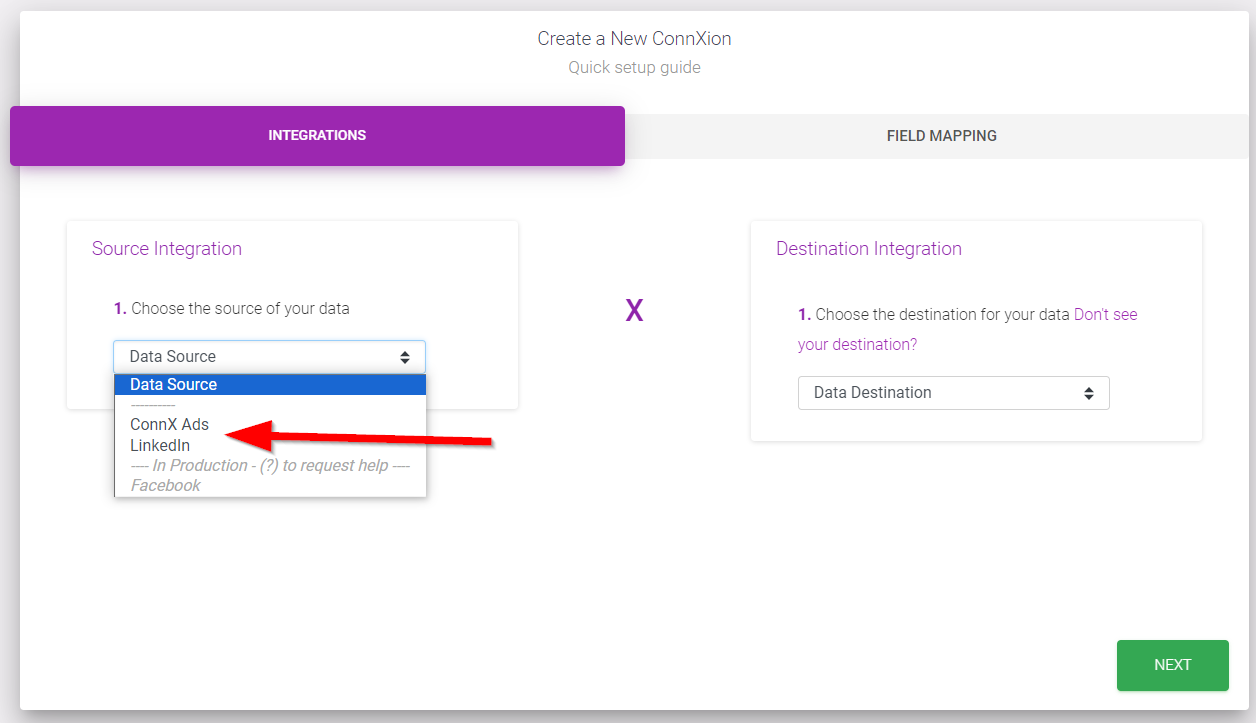
Your source is where the leads are coming from. This will either be your ConnX Ad, or a source other than ConnX (i.e. LinkedIn Lead Generation Ads).
For this tutorial, let's assume you are running your Ad in the ConnX network with the "Buy Leads" program, so you would choose "ConnX Ads".
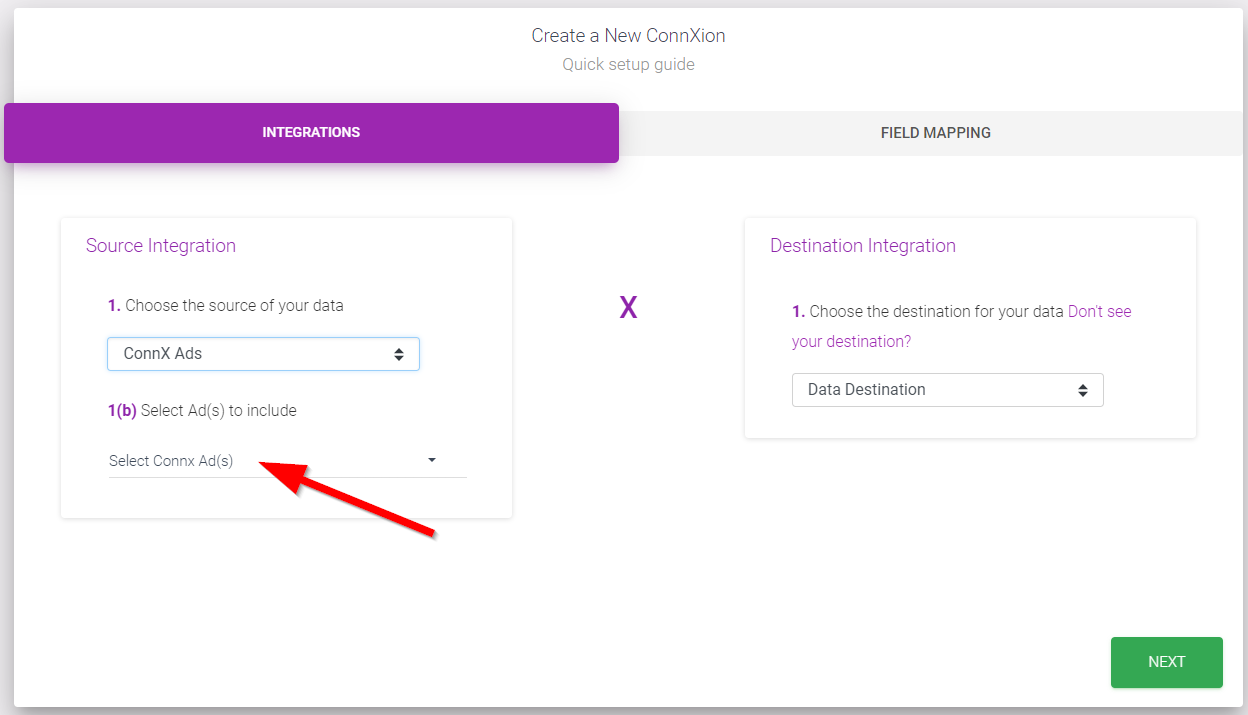
Choose your Ad.
Destination
This is where you tell us where to send your leads. If you use a marketing platform, choose it from the list. We also offer the following custom options:
- Daily batch of file via email: Receive a .CSV file by email, with yesterday's leads, every morning
- Daily batch of file to FTP site: Receive a .CSV file to your FTP server, with yesterday's leads, every morning
- Email (Gmail, Hotmail, etc.): Receive each new lead, in real time, to your email
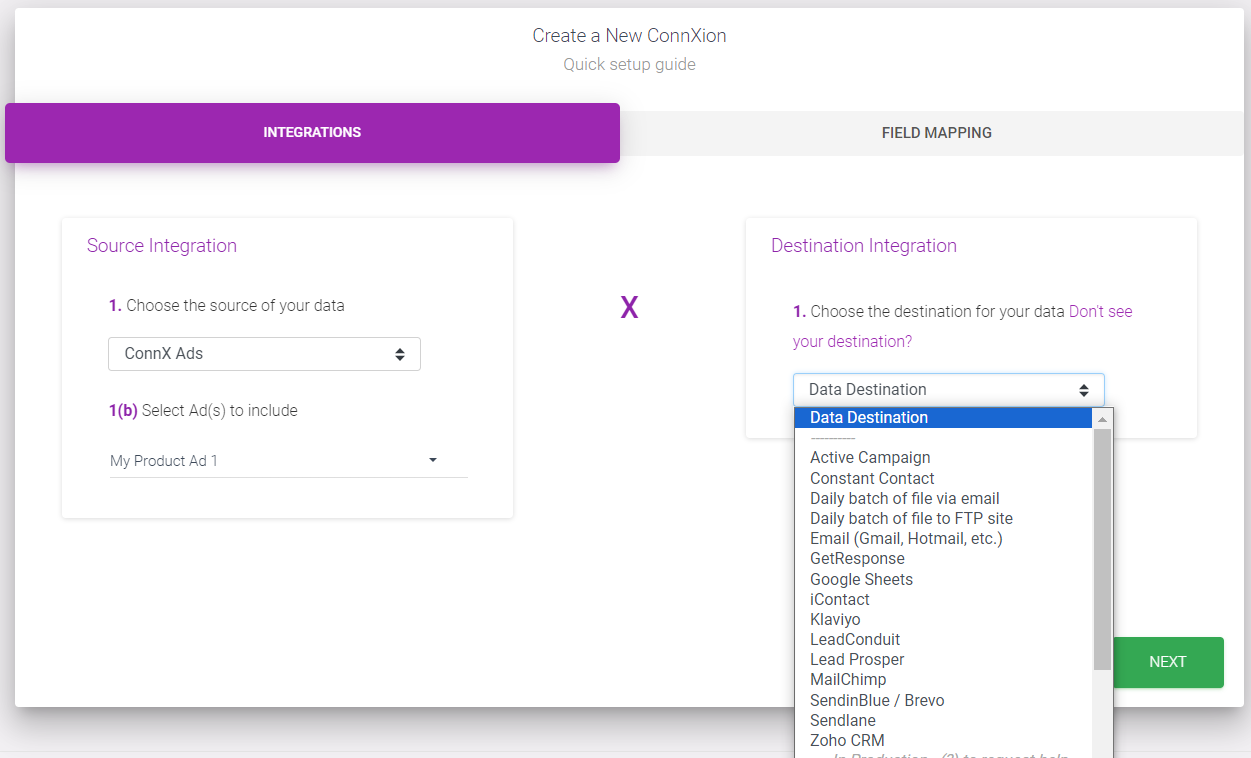
If you choose a marketing partner, you will be prompted for additional information to give us access to add leads directly into your list.
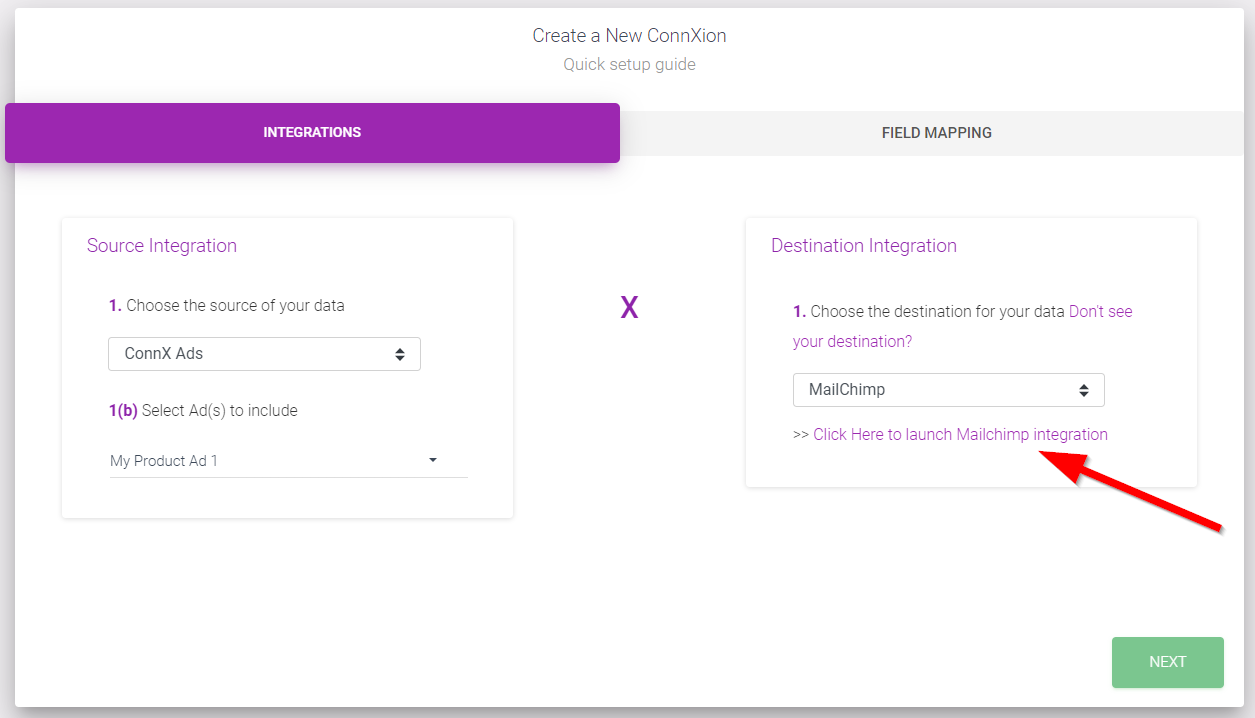
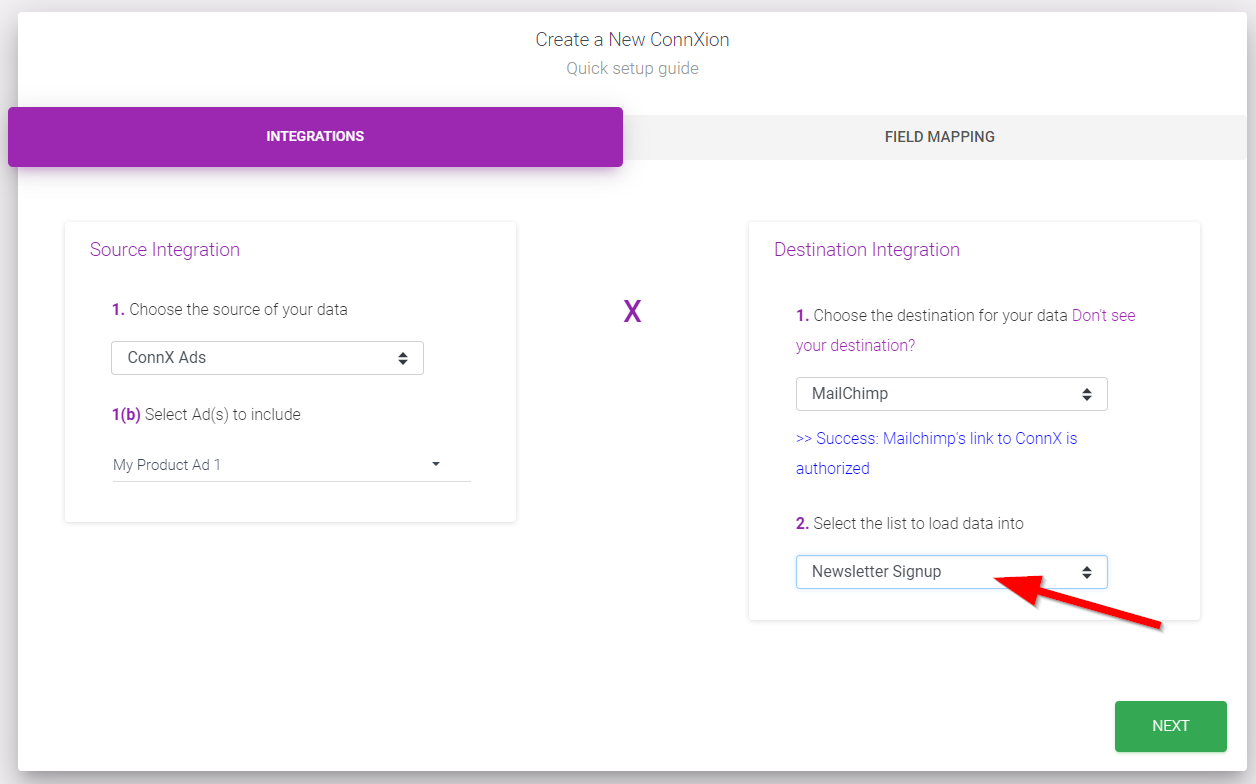
Choose the list you'd like your leads to be added to. Depending on the destination you choose, your experience on this step may vary.
Mapping
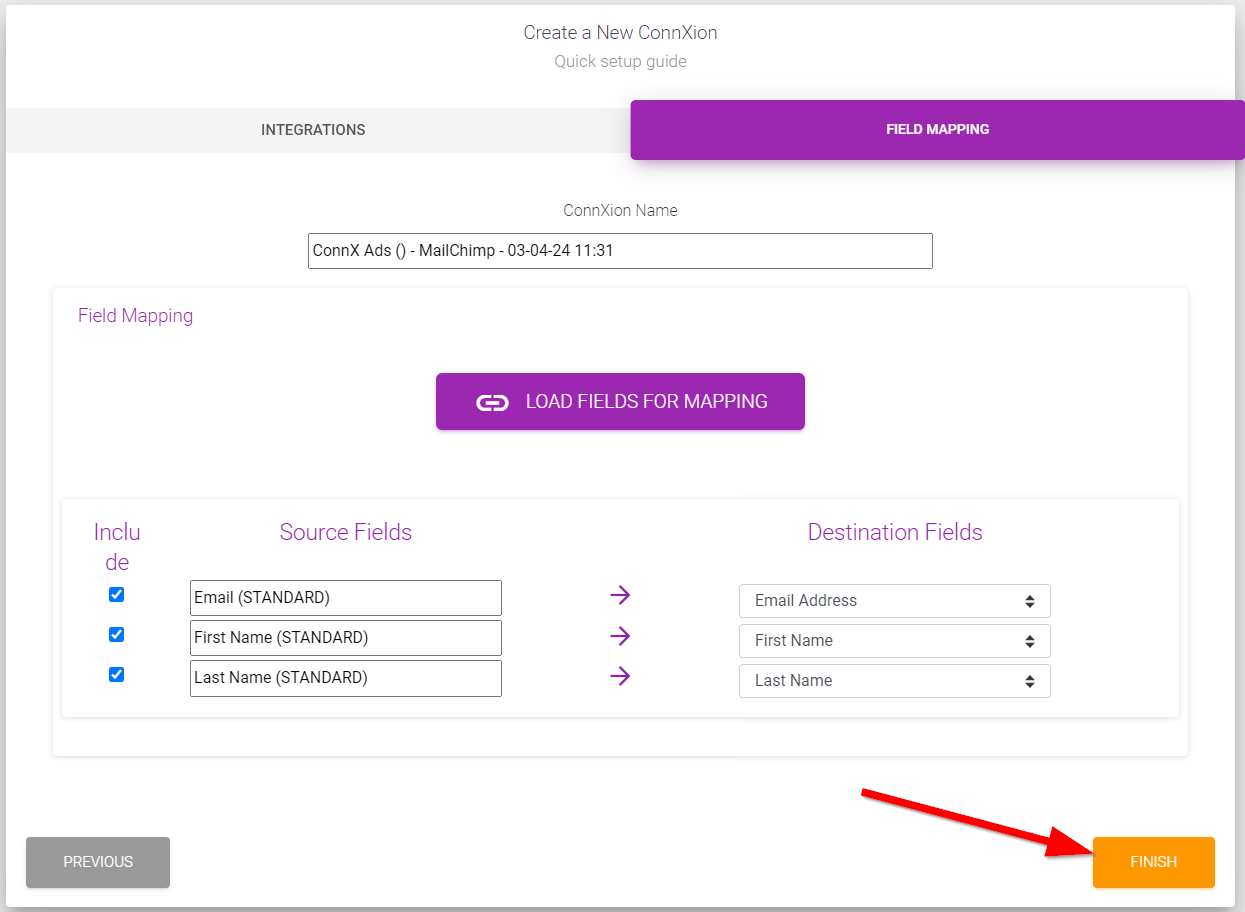
Here, you will tell us which fields in your database should map to the data points from your Ad. Click the "Load Fields for Mapping" button to get started.
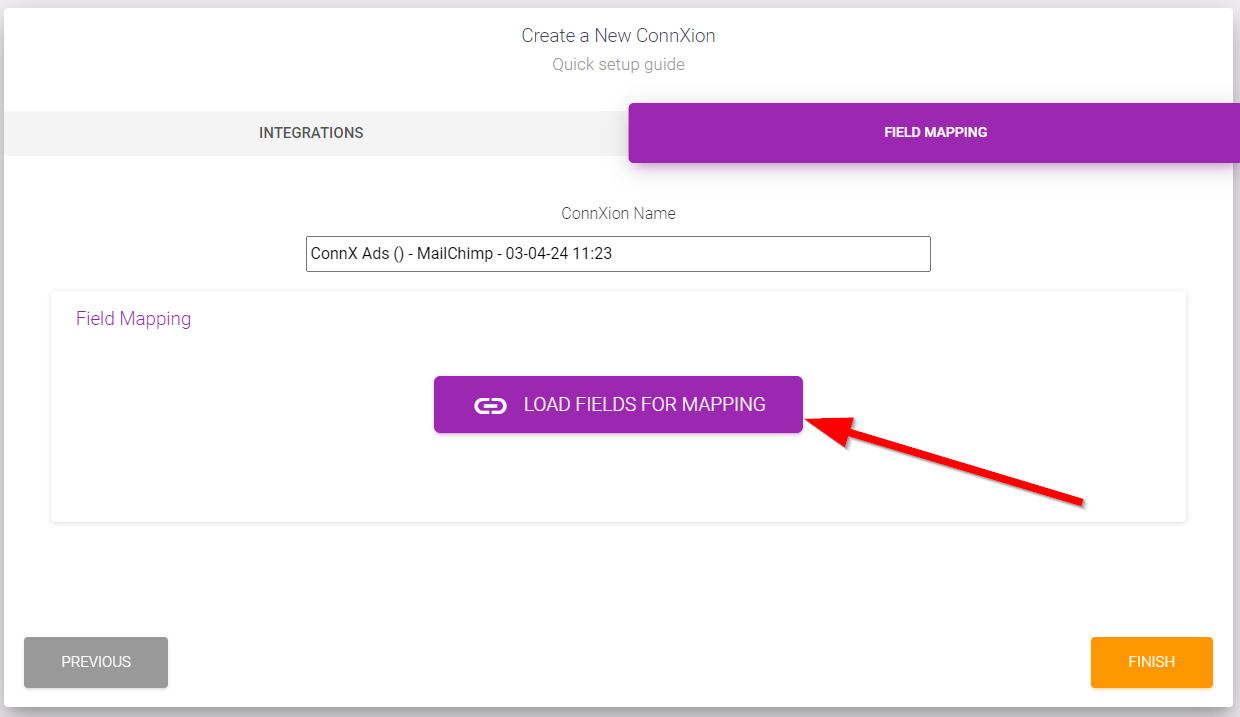
For each data point, choose the corresponding field. You will select a field for each data point. If you don't see a matching field, you will likely need to login to your marketing platform, configure the field, and start the New ConnXion wizard over.
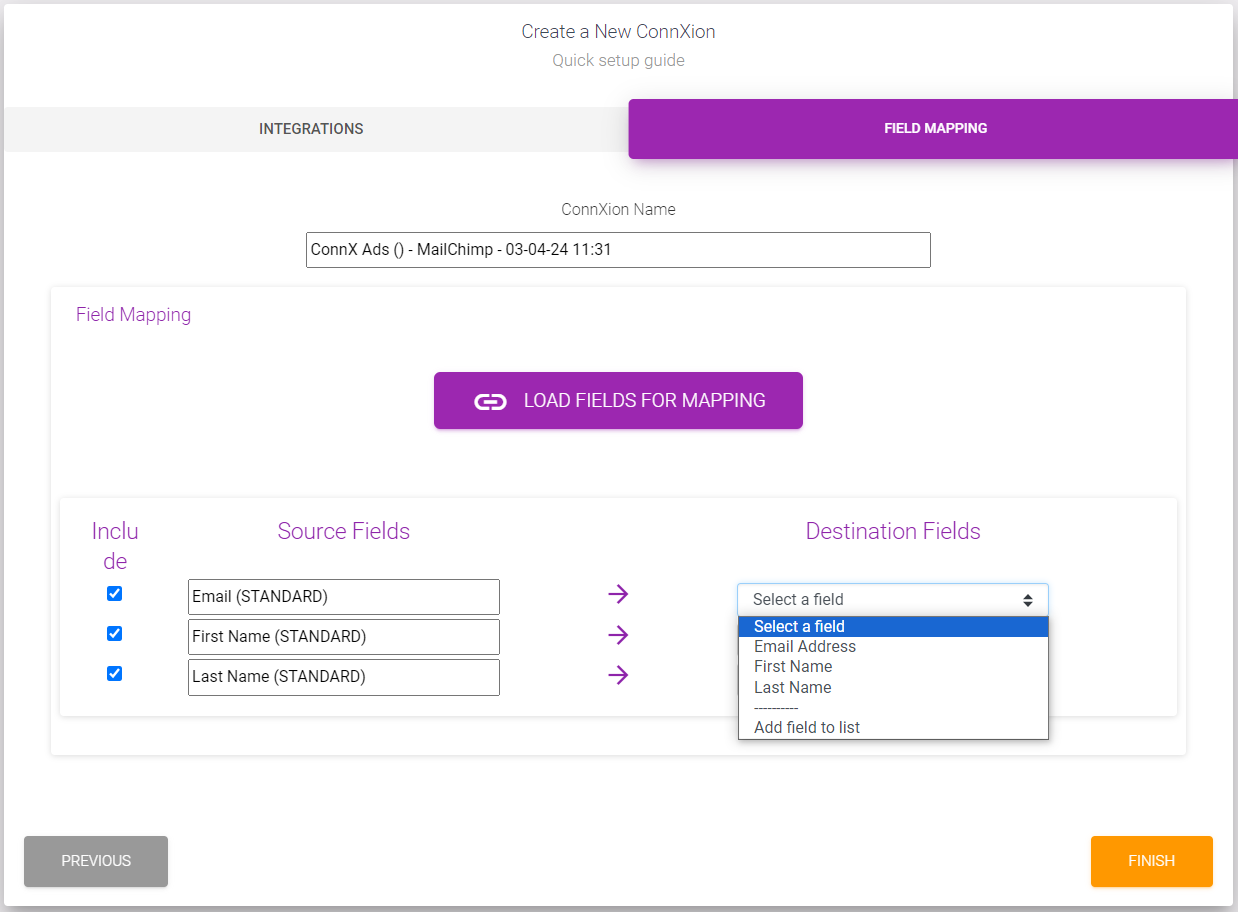
Click Finish when you're done. We will set your Ad live once we successfully test your ConnXion and your Ad is approved!
